Azure Cognitive Services is one of prebuild products that allows us to add AI to our application very quickly. You can develop AI features without the required help of a data scientist. In most cases, you are using the cloud version of this service. When just after creating a service, you can connect to is by library or API.
When to use containers?
In some cases, this is not enough. You would like better control your data, smaller latency, higher throughput, or improved scalability. These characteristics are the most important for me when I think about moving those services to the container.
At first, maybe it is hard to find such situations. Would you mind thinking about the production line where you take photos of items and use your Custom Vision model? In the case of using cloud services, the response will be too long. Another example, please think about a courthouse when you are processing by OCR tons of documents. Of course, you want to make this process effective and secure. In both cases, it means that you do not wish to send your records through the Internet.
And the last example is IoT or mobile devices – this is also a great place for using AI to provide value for your customers.
In all of these cases, I would recommend using a not cloud-deployed version of Cognitive Services.
How to do that
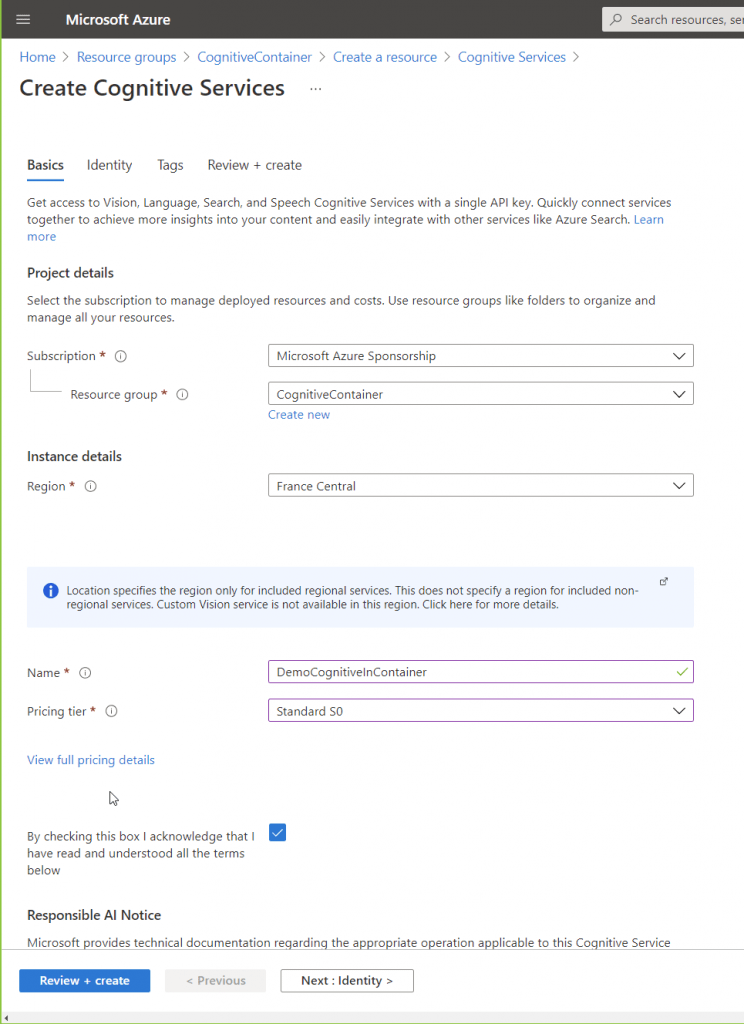
To run Azure Cognitive Services in a container, we need to create the service like we would like to run it in the Cloud. It is required for billing purposes:
Then we will need to get Key and Endpoint addresses. Those values will be required in container preparation. You will find those values on the service page:
Now we can start the preparation of the container. It is straightforward. To run in on the local computer, you will need to have a running Docker environment. I assume that you will be able to do it by yourself. So we need only to download Docker image and run it. I will show how to do that on Sentiment service. The first step – you need to run the command:
docker pull mcr.microsoft.com/azure-cognitive-services/textanalytics/sentiment:3.0-en
and wait for a while. You can see that you can specify the version of the container that you would like to use.
After downloading the package, we can run it. In command, you need to provide the service address and key that have been taken from Azure portal:
docker run --rm -it -p 5000:5000 --memory 8g --cpus 1 \

mcr.microsoft.com/azure-cognitive-services/textanalytics/sentiment:3.0-en \

Eula=accept \

Billing={ENDPOINT_URI} \

ApiKey={API_KEY}
When you did everything correctly, you should get information that the service has started:
To test that everything is correct, you can open the provider page in a browser and then click Service API Description:
Then you should see Swagger page. Here you will be able to test the service in browser:
It looks that everything works correctly. I hope you noticed that you have access to two additional endpoints:
- http://localhost:5000/ready – this verifies that the container is ready to accept a query against the model
- http://localhost:5000/status – this confirms if the API-key used to start the container is valid without causing an endpoint query.
Billing
This topic is confusing for people that are not reading documentation. And the answer is clear. You are changing a hosting environment but still, you need to pay for Cognitive Services in the same way as it would be deployed in Azure Cloud. It also means that you will need to provide a connection to the billing service from your docker. Please note that only billing information will be sent to Microsoft. All other data will not leave docker.
Limitation
In the end, lets’ talk about limitations. You know the first already you need to have a connection to the Internet. You can see that after breaking it for a while, the service on the container will work. There is no guarantee for how long.
The second one. The possibility to run Cognitive Services on the container is limited only to services mentioned in the documentation.


Leave A Comment